
How to buy Skins on Skinvault: A Step-by-Step Guide
Purchasing skins on SkinVault is a straightforward process designed to be user-friendly for gamers and collectors alike. With an emphasis on transparency and ease of use, SkinVault ensures that acquiring your dream skins is a hassle-free experience. Below is a detailed guide, complemented by step-by-step pictures, to help you navigate the buying process on SkinVault.
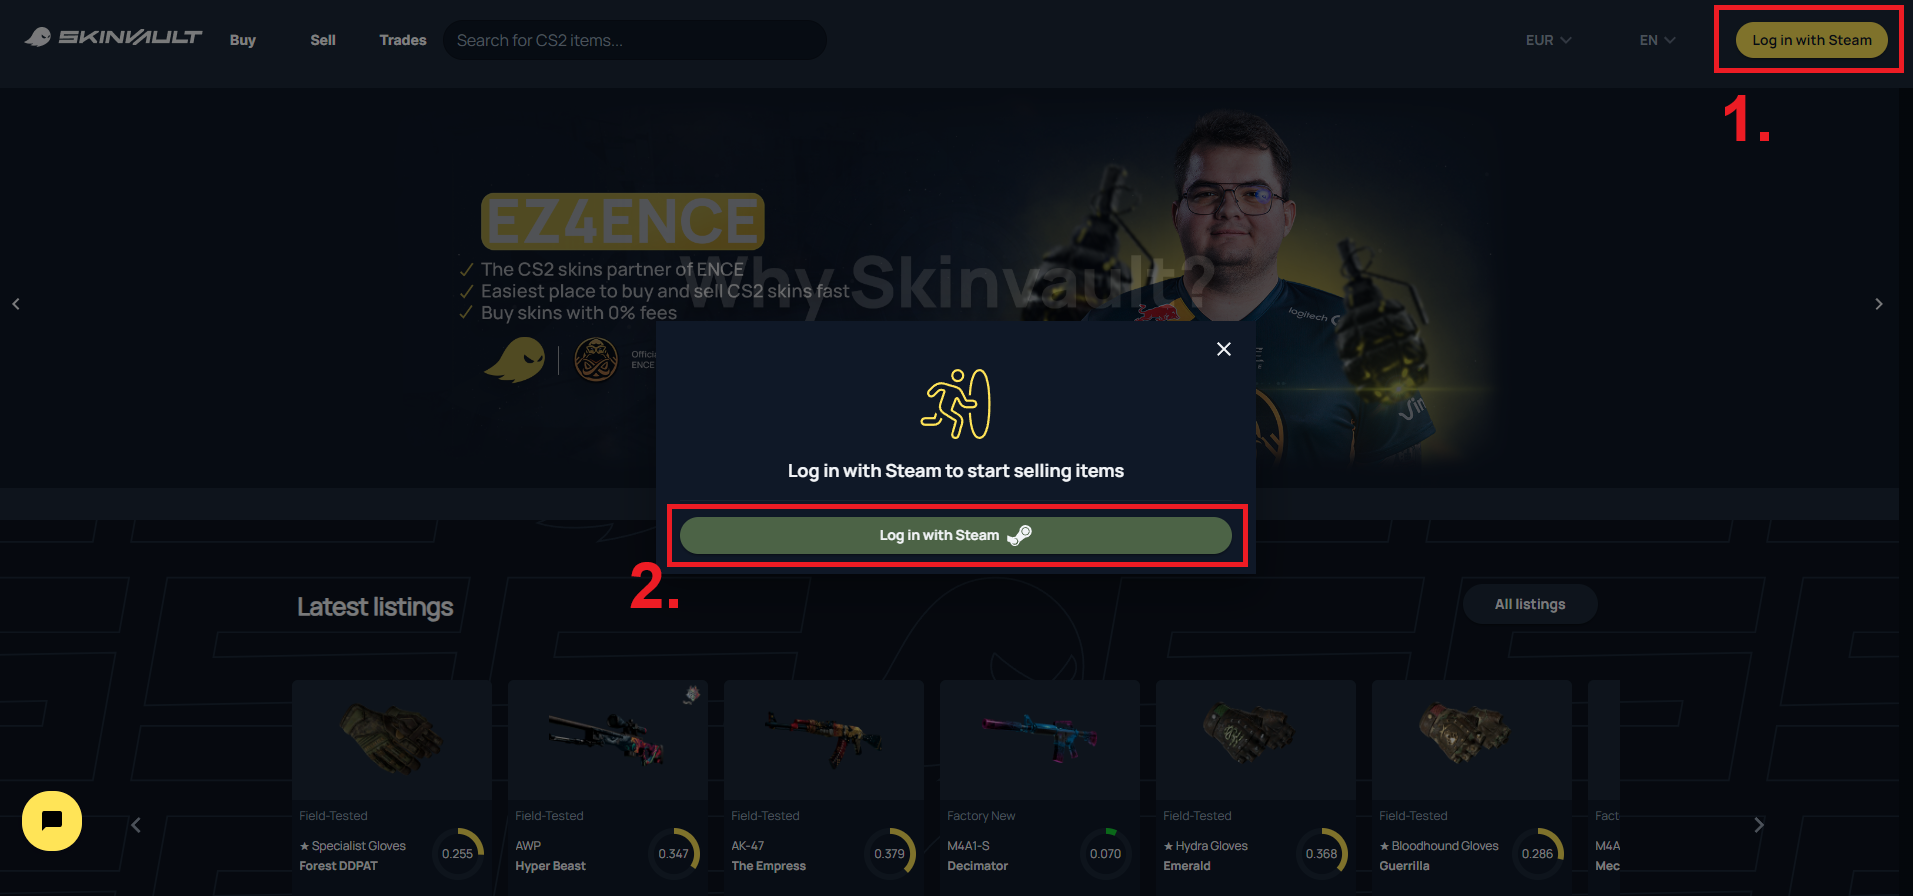
Step 1: Log in with Your Steam Account
Start by logging into SkinVault using your Steam account. You can find the login option at the top-right corner of the homepage. This step ensures a secure and seamless integration with your Steam inventory.
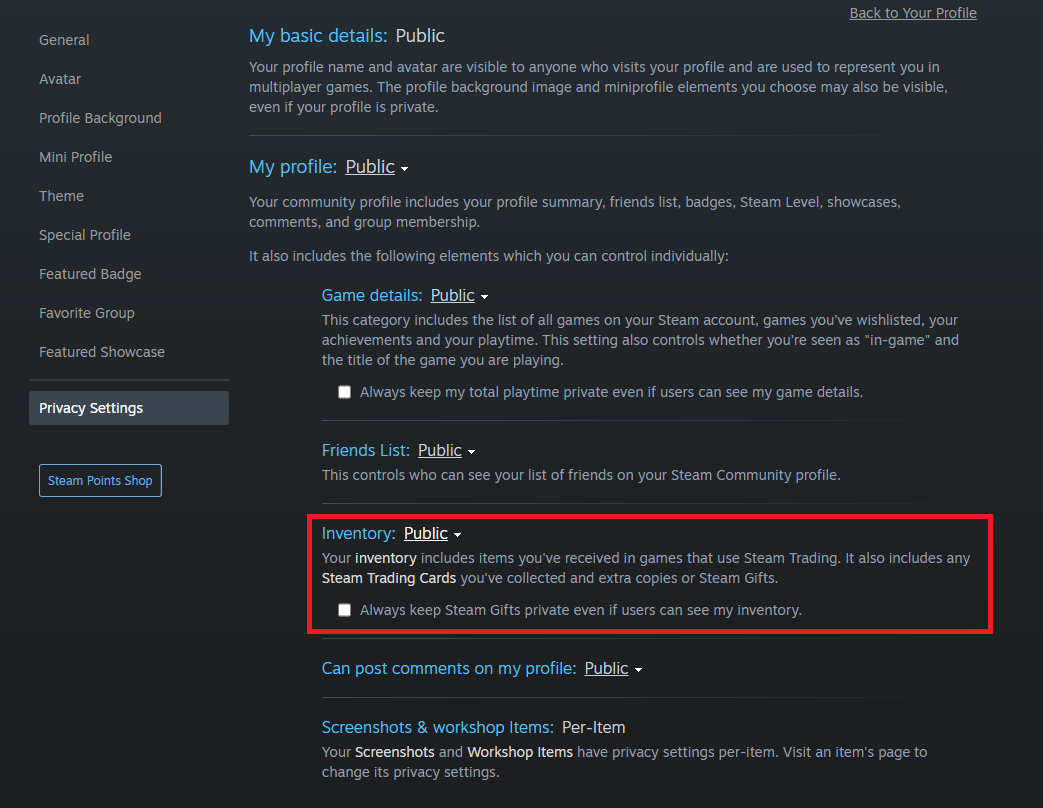
Step 2: Adjust Your Privacy Settings
Before proceeding, make sure your Steam profile's privacy settings are set to Public. This is crucial for the transaction to occur as it allows SkinVault to access your inventory. You can adjust your privacy settings here.
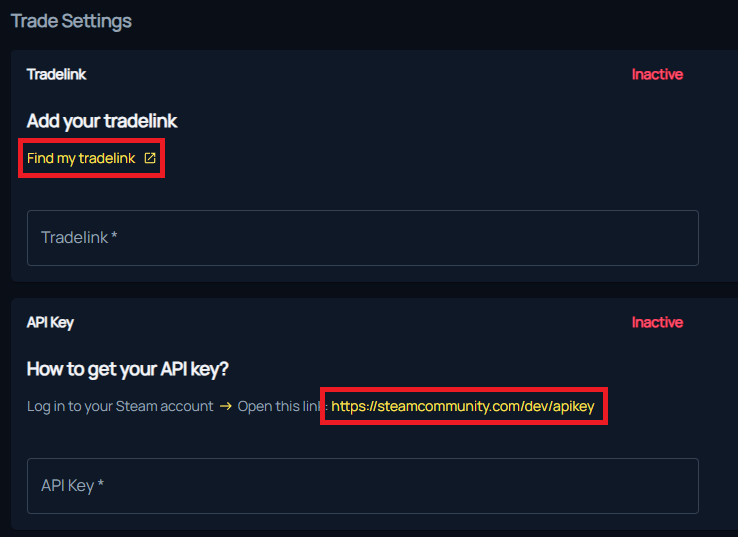
Step 3: Set Up Your Profile
For a successful transaction, you'll need to set up your Steam API-Key, trade link, mobile number, and personal information on SkinVault. This information is essential for facilitating secure and efficient skin trades.
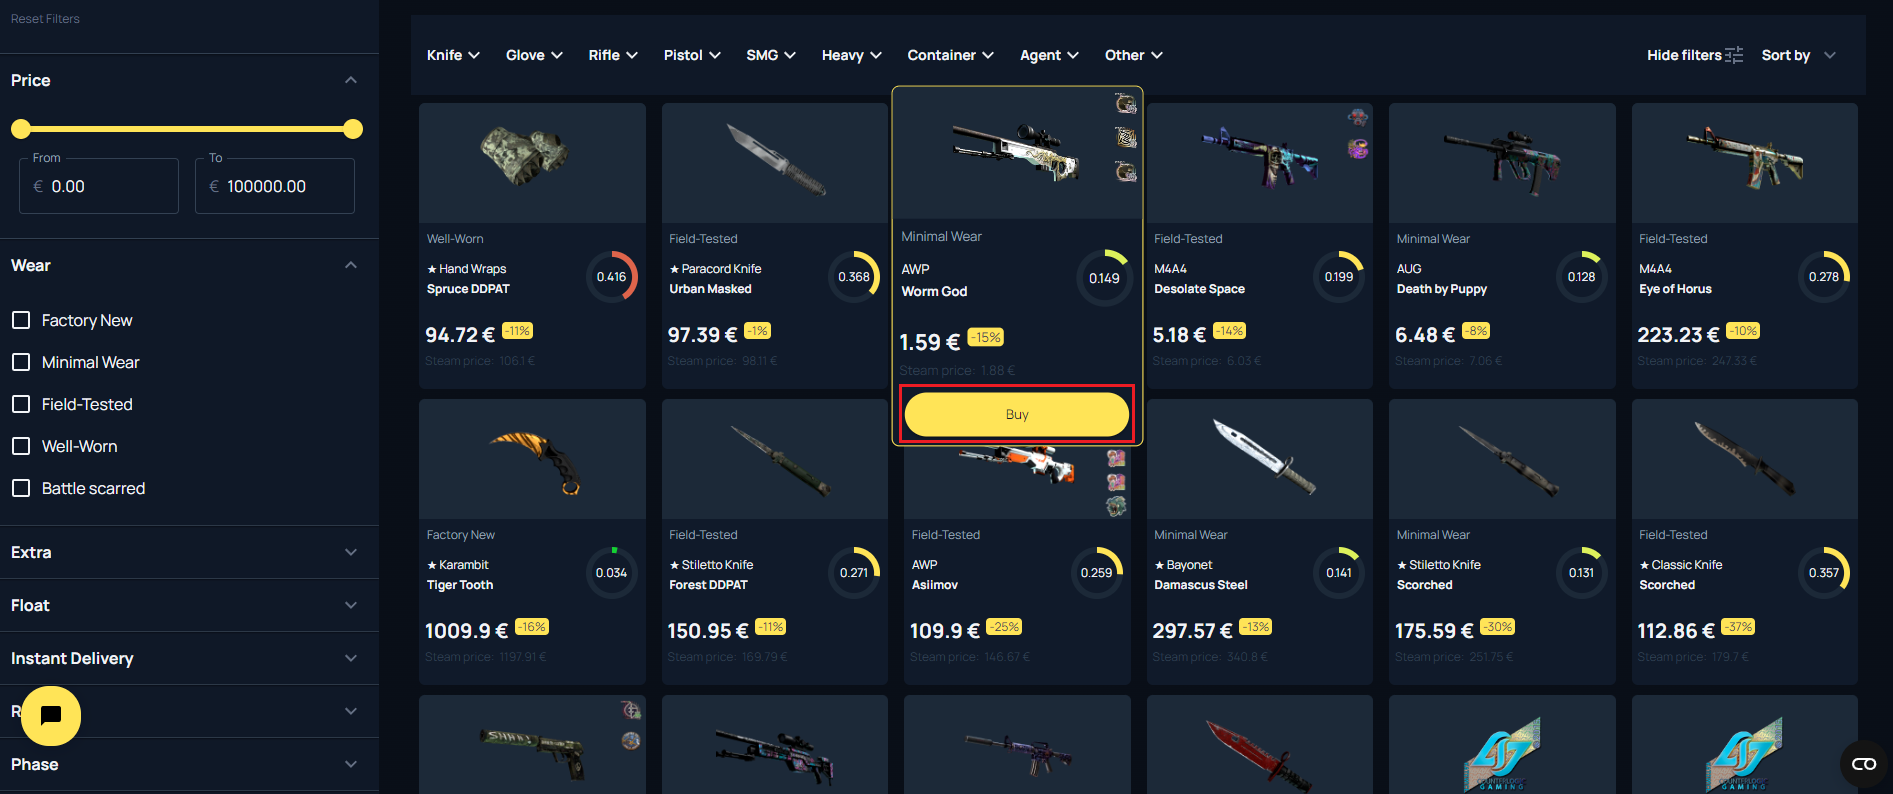
Step 4: Browse and Select Your Desired Skin
Navigate to the 'Buy' page where you can browse through a vast selection of skins. Once you find an item that catches your eye, click the yellow 'Buy' button associated with that item. The price displayed is all-inclusive, with no hidden fees, ensuring transparency in your purchase.
Step 5: Complete Your Purchase
After clicking 'Buy', choose a payment method that suits you from the available options and proceed to checkout. SkinVault offers various payment methods to accommodate different preferences.

Step 6: Initiate the Trade Offer
Following payment, the next step involves sending a trade offer to the seller on Steam, or you may need to wait for the trade offer to come from the seller. Detailed instructions will be provided, ensuring you know exactly what to do.
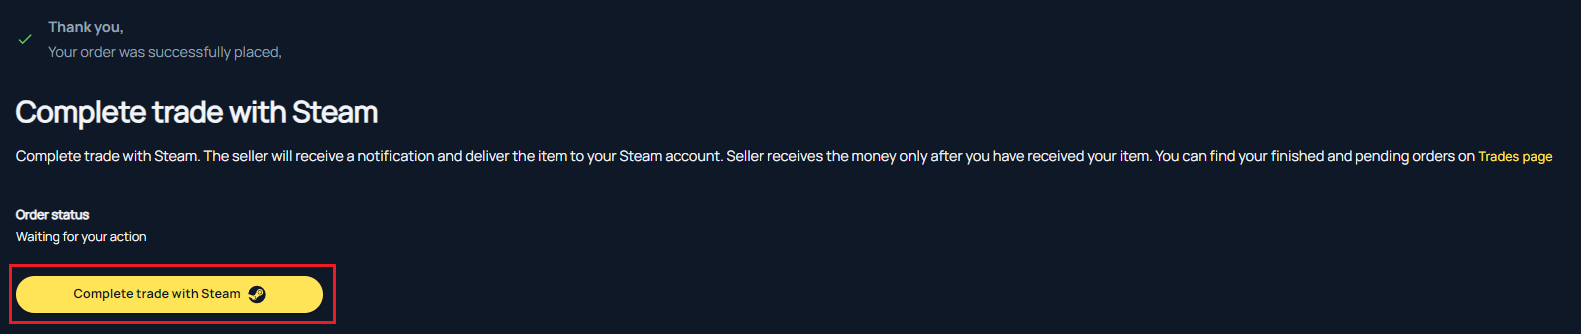

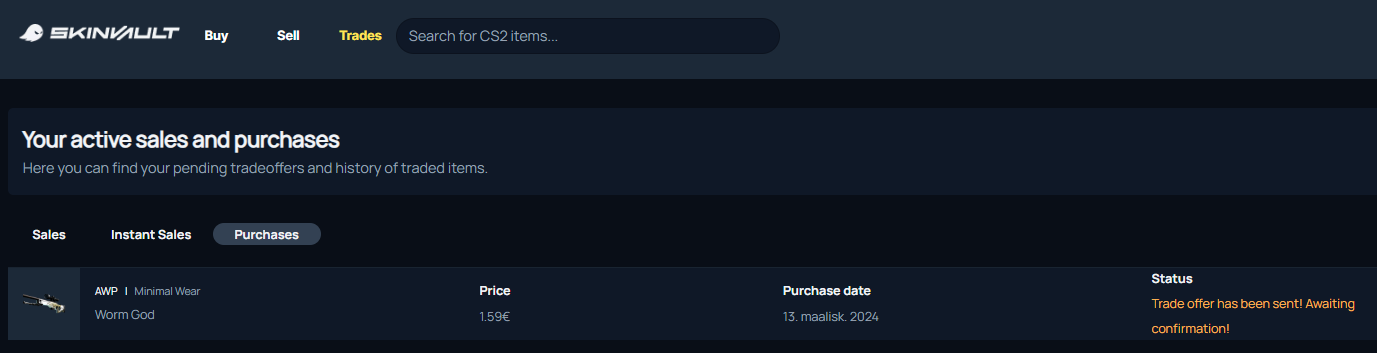
Step 7: Confirm the Trade
After sending the trade offer, the seller on Skinvault is notified and prompted to accept the trade. At this point, all you need to do is wait for the seller to complete the transaction on their end. You can check the progress in the "trades" tab. If you did everything right, it should look something like this:
Step 8: Completion and Support
Once the seller accepts the trade offer, the transaction is complete, and the skin will be added to your Steam inventory. Should you encounter any issues or have questions during the buying process, SkinVault's support team is readily available to assist you.
Money-Back Guarantee
SkinVault prioritizes customer satisfaction and trust. If the seller refuses or does not respond to the trade offer within 18 hours, the transaction is canceled, and you will be refunded. However, such instances are rare, as sellers typically accept trade offers promptly.
This guide, along with the accompanying images, should provide you with all the information you need to successfully purchase skins on SkinVault. Whether you're looking to add to your collection or find that perfect skin to enhance your gaming experience, SkinVault makes the process straightforward and secure. Happy shopping!